Medion GoPal Manuel d'utilisateur
Naviguer en ligne ou télécharger Manuel d'utilisateur pour Systèmes de navigation pour voitures Medion GoPal. Medion Car Navigation system GoPal Manuel d'utilisatio
- Page / 52
- Table des matières
- MARQUE LIVRES
- Software manual 1
- Contents 2
- Chapter 1. Introduction 4
- System requirements 6
- Conventions in this manual 6
- Tips and warnings 7
- Important information 7
- Trademarks 8
- Copyright and Warranty 8
- Initial operation 9
- Assistant 13
- Menu bar 14
- Setting the user language 15
- Changing the device name 19
- Operation in the menu view 21
- Operation in the map view 22
- Basic settings for operation 24
- Volume settings 25
- Screen settings 25
- Power management 25
- Auto OFF function 26
- FM transmitter 27
- Restore factory settings 27
- Adjusting the route options 28
- Adjusting the Display 29
- Manual entry in the map view 40
- Adding more destinations 41
- Selecting Points of interest 42
- Managing favourites 43
- Changing the route 44
- Adding a destination 45
- Optimising the route 45
- Saving and loading a tour 46
- Starting tour calculation 46
- Route information 47
- Route simulation 48
- Compass display 50
- Arrow view 51
- Trip info 51
Résumé du contenu
Software manual GoPal Navigator Version 4
Manual installation and start-up 9 If you switch on your navigation device without inserting the memory card supplied, the following screen appears.
Manual installation and start-up 10 Note You must remove the old software components before you can install the new software onto your navigation dev
Manual installation and start-up 11 ally or using the Setup Assistant on the CD/DVD. In addition, your navigation device must be con-nected to the PC
GoPal Navigator 4 12 Chapter 3. Installation and start-up using the GoPal® Assistant In addition to manual installation, it is also possible to trans
Installation and start-up using the GoPal® Assistant 13 The GoPal® Assistant interface is divided as follows: Menu bar You can operate all of the b
Installation and start-up using the GoPal® Assistant 14 The entry About opens the dialog box of the same name which contains information about the cu
Installation and start-up using the GoPal® Assistant 15 Manual actions for data exchange You can select specific information using the categories in
Installation and start-up using the GoPal® Assistant 16 Note The memory currently used in the selected drive is marked by the slider on the memory st
Installation and start-up using the GoPal® Assistant 17 3. Select Import recorded GPS tracks and click on the Synchronize button: The GPS tracks wil
Installation and start-up using the GoPal® Assistant 18 The navigation software currently installed on the device is displayed here. • Date of last
GoPal Navigator Version 4 i Contents CHAPTER 1. INTRODUCTION ... 3 Gre
Installation and start-up using the GoPal® Assistant 19 Shopping in the GoPal shop portal With the Shop button the GoPal® Assistant provides direct a
GoPal Navigator 4 20 Chapter 4. Basics of operation Your navigation device is ready to operate immediately following start-up. However, in order to e
Basics of operation 21 buttons. On various screens you can lower or raise a pre-set value. • To lower or raise the currently displayed value, press
Basics of operation 22 Buttons Status displays The distance to the next manoeuvre is dis-played here. This button opens the settings window Vo
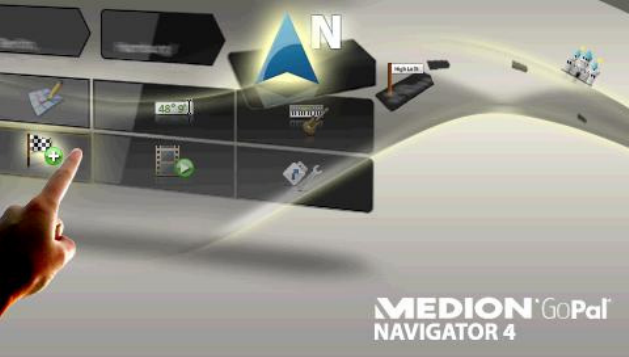
GoPal Navigator 4 23 Chapter 5. Adjusting the Settings After starting your navigation device, the start screen gives you the available function areas
Adjusting the settings 24 Volume settings In this sub-menu, you can set the volume individually for the voice output and the key click. The v
Adjusting the settings 25 reactivated and the most recently active screen is displayed. • The current charge of the battery is displayed on
Adjusting the settings 26 • The button returns you to the screen that was active before the plug was pulled out. • The button switches the devi
Adjusting the settings 27 • Program settings • Help The following describes the available setting menus as well as the setting options available
Adjusting the settings 28 in your way that would affect your travel time. • The use of ferries is taken into account for the purposes of route calc
Software manual ii CHAPTER 5. ADJUSTING THE SETTINGS ... 23 Basic settings for operation...
Adjusting the settings 29 Tip The settings for daytime and night vision can be adjusted as required in the Screen set-tings > Setup brightness men
Adjusting the settings 30 • The menu language of the navigation software is pre-set by selecting the country-specific installation file or by selec
Adjusting the settings 31 gram settings) using the available TMC information. As an alternative to the setting you can select the following options:
Adjusting the settings 32 Note Depending on the distance format in the Program settings > Units (see below), exceed-ing the speed limit is measure
Adjusting the settings 33 1. Tap on the button Quick menu settings in the toolbar in the Quick menu. The Quick menu settings menu then open
GoPal Navigator 4 34 Chapter 6. Operating the GoPal® na-vigation software This section covers the basic set-up and operation of your navigation softw
Operating the GoPal® navigation software 35 Tip If you have already entered one or more destinations into your navigation device, three buttons with
Operating the GoPal® navigation software 36 Note With the help of the GoPal® Assistant you can select which map material is saved on y-our navigatio
Operating the GoPal® navigation software 37 Proceed as follows to enter the street name: 1. Type the first character on the screen keyboard: The k
Operating the GoPal® navigation software 38 window. Browse through the list using the and buttons. The Display on map button allows you to have t
GoPal Navigator 4 3 Chapter 1. Introduction Greeting Welcome and thank you for choosing our mobile navigation system. While the instructions in-clude
Operating the GoPal® navigation software 39 3. Close the input field using the button: The destination is saved as a favourite on your navi-gation
Operating the GoPal® navigation software 40 1. Tap on the desired position within the map section displayed. If required, first zoom to the de-sired
Operating the GoPal® navigation software 41 2. Use the buttons to choose from the following options: o Tap the button Enter new dest. to enter the
Operating the GoPal® navigation software 42 o Tap the button Nearby to select a POI near your current position. o Tap the button Along the Route to
Operating the GoPal® navigation software 43 vourites as necessary using the same method. If you have created more than four favourites, you can brows
Operating the GoPal® navigation software 44 1. Tap on the list entry Last known position on the menu screen Route planning: The menu New destination
Operating the GoPal® navigation software 45 Tip Note that optimisation only takes place if the route/tour comprises more than two destina
Operating the GoPal® navigation software 46 the Starting and displaying navigation section. Route information The route information menu enables you
Operating the GoPal® navigation software 47 3. Tap the Show locationbutton to display the position of the traffic disturbance on the map view: You c
Operating the GoPal® navigation software 48 • Tap the button on the Detailed information screen to start navigating to a new destination, a POI, a
Introduction 4 Element Description Target folder ActiveSync This folder contains the installation data for the synchronisation software Microsoft®
Operating the GoPal® navigation software 49 map display is activated again after the manoeuvre. • POIs such as petrol stations, rest areas etc. are
Operating the GoPal® navigation software 50 Tip Your navigation system uses the signals from several satellites to determine the position. There may
Operating the GoPal® navigation software 51 • Average speed • Route travelled • Travel time This information refers to all of the routes travelled
Introduction 5 Adobe® Acrobat® Reader® to be able to take advantage of the corresponding functions. In addition, it may be necessary, due to a malfun
Introduction 6 The information in this manual documents the operation of the navigation software, explains the graphic display on the screen of your
Introduction 7 Trademarks All trademarks appearing in this manual and any brands or trademarks protected by third parties are subject without restric
GoPal Navigator 4 8 Chapter 2 Manual installation and start-up The Windows CE operating system has already been installed on your navigation device.
Plus de documents pour Systèmes de navigation pour voitures Medion GoPal

Produits connexes et manuels pour Systèmes de navigation pour voitures Medion GoPal
 (98 pages)
 (112 pages)
 (96 pages)
© 2020, manymanuals.fr. Tous droits réservés | 7.243 s |
 Manymanuals.com
 Manymanuals.de
 Manymanuals.fr
 Manymanuals.it
 Manymanuals.pl
 Manymanuals.cz
 Manymanuals.es
 Manymanuals-pt.com
Commentaires sur ces manuels